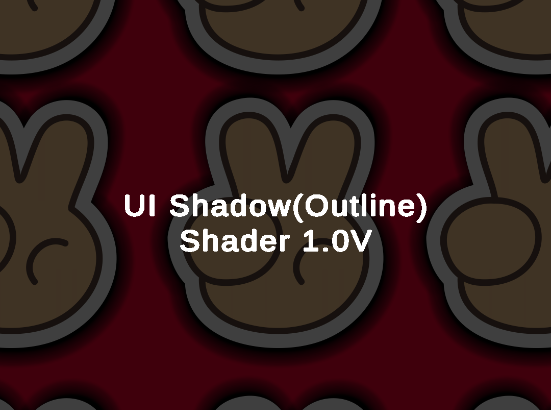
작업하다가 프레임 체커가 더 좋은게 있어서

남기는 용도로 저장(내 마음쏚~~~~ 져쟝~~~♡ ^^^^^^^^)


using UnityEngine;

using TMPro;
using System;

namespace MirzaBeig.VolumetricFogLite
{
    [ExecuteAlways]
    public class FPSDisplay : MonoBehaviour
    {
        public float fps { get; private set; }      // Frames per second (interval average).
        public float frameMS { get; private set; }  // Milliseconds per frame (interval average).

        GUIStyle style = new GUIStyle();

        public int size = 16;

        [Range(0.0f, 2.0f)]
        public float scale = 1.0f;

        [Space]

        public Vector2 position = new Vector2(16.0f, 16.0f);

        public enum Alignment { Left, Right }
        public Alignment alignment = Alignment.Left;

        [Space]

        public Color colour = Color.green;

        [Space]

        public float updateInterval = 0.5f;

        float elapsedIntervalTime;
        int intervalFrameCount;

        [Space]

        [Tooltip("Optional. Will render using GUI if not assigned.")]
        public TextMeshProUGUI textMesh;

        // Get average FPS and frame delta (ms) for current interval (so far, if called early).

        public float GetIntervalFPS()
        {
            // 1 / time.unscaledDeltaTime for same-frame results.
            // Same as above, but uses accumulated frameCount and deltaTime.

            return intervalFrameCount / elapsedIntervalTime;
        }
        public float GetIntervalFrameMS()
        {
            // Calculate average frame delta during interval (time / frames).
            // Same as Time.unscaledDeltaTime * 1000.0f, using accumulation.

            return (elapsedIntervalTime * 1000.0f) / intervalFrameCount;
        }

        void Update()
        {
            intervalFrameCount++;
            elapsedIntervalTime += Time.unscaledDeltaTime;

            if (elapsedIntervalTime >= updateInterval)
            {
                fps = GetIntervalFPS();
                frameMS = GetIntervalFrameMS();

                fps = (float)Math.Round(fps, 2);
                frameMS = (float)Math.Round(frameMS, 2);

                intervalFrameCount = 0;
                elapsedIntervalTime = 0.0f;
            }

            if (textMesh)
            {
                textMesh.text = GetFPSText();
            }
            else
            {
                style.fontSize = Mathf.RoundToInt(size * scale);
                style.fontStyle = FontStyle.Bold;
                style.normal.textColor = colour;
            }
        }

        string GetFPSText()
        {
            return $"FPS: {fps:.00} ({frameMS:.00} ms)";
        }

        void OnGUI()
        {
            string fpsText = GetFPSText();

            if (!textMesh)
            {
                Vector2 scaledPosition = position * scale;

                float x = scaledPosition.x;

                if (alignment == Alignment.Right)
                {
                    x = Screen.width - x - style.CalcSize(new GUIContent(fpsText)).x;
                }

                GUI.Label(new Rect(x, scaledPosition.y, 200, 100), fpsText, style);
            }
        }
    }
}

'Unity > Script' 카테고리의 다른 글

[Unity] Camare Position Move v1.0  (1) 2024.06.18
FrameChecker  (0) 2024.01.02

Unity URP 에서 기본으로 제공되던 Simple Camare Controler 가 있었지만,
어느순간 이 스크립트는 증발해버렸다 (잠수함패치 싫허효,,)


어디서 긁은거 + GPT를 활용하여 Unity Game View 에서 활용가능한 스크립트를 공유하고자 한다.


using UnityEngine;

public class FlyCamera : MonoBehaviour
{
    public Transform targetCamera; // 카메라 오브젝트를 할당할 프로퍼티

    public float mainSpeed = 1.0f; // regular speed
    public float shiftAdd = 250.0f; // multiplied by how long shift is held. Basically running
    public float maxShift = 1000.0f; // Maximum speed when holding shift
    public float camSens = 0.25f; // How sensitive it is with mouse
    public bool invertY = true;

    public float scrollWheelSens = 1f;
    public float verticalSpeed = 1.0f; // Q와 E키의 Y축 이동 속도

    private Vector3 lastMouse = new Vector3(255, 255, 255); // kind of in the middle of the screen, rather than at the top (play)
    private float totalRun = 1.0f;

    void Update()
    {
        if (targetCamera == null)
        {
            Debug.LogWarning("Target camera is not assigned.");
            return;
        }

        Camera cameraComponent = targetCamera.GetComponent<Camera>();
        if (cameraComponent == null)
        {
            Debug.LogWarning("No Camera component found on target.");
            return;
        }

        if (Input.GetMouseButton(1))
        {
            Cursor.visible = false;
            Cursor.lockState = CursorLockMode.Locked;

            var mouseMoveY = invertY ? -1 * Input.GetAxis("Mouse Y") : Input.GetAxis("Mouse Y");
            var mouseMoveX = Input.GetAxis("Mouse X");

            var mouseMove = new Vector3(mouseMoveY, mouseMoveX, 0) * camSens;
            targetCamera.eulerAngles = targetCamera.eulerAngles + mouseMove;
        }
        else
        {
            Cursor.visible = true;
            Cursor.lockState = CursorLockMode.None;
        }

        // Mouse camera angle done.

        // Keyboard commands
        Vector3 p = GetBaseInput();
        if (p.sqrMagnitude > 0)
        { // only move while a direction key is pressed
            if (Input.GetKey(KeyCode.LeftShift))
            {
                totalRun += Time.deltaTime;
                p = p * totalRun * shiftAdd;
                p.x = Mathf.Clamp(p.x, -maxShift, maxShift);
                p.y = Mathf.Clamp(p.y, -maxShift, maxShift);
                p.z = Mathf.Clamp(p.z, -maxShift, maxShift);
            }
            else
            {
                totalRun = Mathf.Clamp(totalRun * 0.5f, 1f, 1000f);
                p = p * mainSpeed;
            }

            p = p * Time.deltaTime;
            Vector3 newPosition = targetCamera.position;
            if (Input.GetKey(KeyCode.Space))
            { // If player wants to move on X and Z axis only
                targetCamera.Translate(p);
                newPosition.x = targetCamera.position.x;
                newPosition.z = targetCamera.position.z;
                targetCamera.position = newPosition;
            }
            else
            {
                targetCamera.Translate(p);
            }
        }

        // Q and E key for vertical movement
        if (Input.GetKey(KeyCode.Q))
        {
            targetCamera.position += Vector3.down * mainSpeed * Time.deltaTime;
        }
        if (Input.GetKey(KeyCode.E))
        {
            targetCamera.position += Vector3.up * mainSpeed * Time.deltaTime;
        }

        var scroll = Input.GetAxis("Mouse ScrollWheel");
        mainSpeed += scroll * scrollWheelSens;

        // If the camera is orthographic, adjust the orthographic size with W and S keys
        if (cameraComponent.orthographic)
        {
            if (Input.GetKey(KeyCode.W))
            {
                cameraComponent.orthographicSize -= mainSpeed * Time.deltaTime;
            }
            if (Input.GetKey(KeyCode.S))
            {
                cameraComponent.orthographicSize += mainSpeed * Time.deltaTime;
            }

            // Clamp the orthographic size to prevent it from getting too small or negative
            cameraComponent.orthographicSize = Mathf.Clamp(cameraComponent.orthographicSize, 0.1f, 100f);
        }
    }

    private Vector3 GetBaseInput()
    { // returns the basic values, if it's 0 then it's not active.
        Vector3 p_Velocity = new Vector3();
        if (Input.GetKey(KeyCode.W))
        {
            p_Velocity += new Vector3(0, 0, 1);
        }
        if (Input.GetKey(KeyCode.S))
        {
            p_Velocity += new Vector3(0, 0, -1);
        }
        if (Input.GetKey(KeyCode.A))
        {
            p_Velocity += new Vector3(-1, 0, 0);
        }
        if (Input.GetKey(KeyCode.D))
        {
            p_Velocity += new Vector3(1, 0, 0);
        }
        return p_Velocity;
    }
}

'Unity > Script' 카테고리의 다른 글

[Unity] Frame Checker On Editor  (0) 2024.06.18
FrameChecker  (0) 2024.01.02


HNINE_UIShadow_SHD.unitypackage
0.07MB


Unity 2022.3.18f

*Legacy Pipeline 으로 제작된 Shader이며,
URP, HDRP 에서 동작하지 않을 수 있습니다.


** 겔럭시 S22 기준 준수한 퍼포먼스이나,,
**** 그림자가 애니메이션 되어야되는 특수 환경을 위한 쉐이더일 뿐 무작정 붙여서 쓰시면안됩니다.


// Unity UI canvas Shader 1.0v

// - 별도의 텍스처 없이 원본텍스처 한장이면 그림자를 생성하는 쉐이더 이며, 모바일 상에서 퍼포먼스 이슈가 있음,

// 1.0v
// ㅁ UI Color 대응 및 Shadow Tint Color 대응
// ㅁ 양방향 Blur 구현
// ㅁ 고성능 모드 구현


Unity또는 Unreal 처럼 게임엔진을 사용하게 된다면 기본적으로 

원하는 LookDev구현을 위해 기본적으로 지원되는 Lit 또는 Standrad Material (PBR기반)를 사용할 것이다.


물론 많은 것을 지원해주지만 디테일한 LookDev 구현 및 FX, 장면 전환 등의 효과를 만들기 위해서는

지원되는 Material에서는 한계가 분명하며 결국 직접 구현을 하게 된다!
*까짓거 내가 만들어야지!!! 하고 만들어서 보고올려서 컨펌이 나기 시작하면 그때 부터 TA의 시작인 것이다.

이 글은 그렇게 시작하게된 글쓴이의 시작이자 앞으로 Shader를 작성하게 될 분들을 위해 바친다.

*한국 유니티 커뮤니티의 빛과 소금이 신 이상윤님과 마둠파, 대마왕님께 감사인사를 전하고싶습니다.


입문 편이기 때문에 Node로 제작하는 파이프라인에 관련된 설명을 하고자 하며,
파이프라인과 HLSL 코드의 경우 차후 글을 작성하고자 한다.


1. Unity Shader Graph

라때에는 3D(Legucy)에서 Code로 작성하거나 별도 플러그인을 활용하는 것 밖에 방법이 없엇어~~~ 라고 말하고싶다

이러한 니즈를 Unity 개발자 분들께서 인지하셔서 내부 파이프라인으로 만들어진 Node 기반 Shader 작성 툴이다.

Unity에서 만들었기 때문에 대부분의 기능을 조금만 공부한다면 누구나 다 사용할 수 있을 정도로 친절하게 되어있으며,

이를 통해 전체적인 로직에 대한 이해도를 높이고 그 다음에 코드로 넘어가는 것이 정신 건강에 이로울 수 있다고 생각한다.


기본 로직은 Unity에서 제공하는 HLSL를 임포트 받아 사용하기 때문에 커스텀한 부분을 아주 손쉽게 사용할 수 있다.

전체 Node에 대한 설명을 하기에는 분량이 방대하여


다시 등장하는 빛과 소금이신 고라니 님의 유투브 링크를 빌려 오고자 한다.
*10번 다시봐도 너무 좋은 자료다.


https://www.youtube.com/watch?v=KnueAgpUL3Y&t=1s&pp=ygUW6rOg652864uIIFVuaXR5IFNoYWRlcg%3D%3D


Unity Shader Graph의 경우 단순 Node를 사용하는 방법 뿐만 아니라

기본적인 Code 작성이 가능하다면 Custom Funsion을 활용하여 Custom Node를 작성할 수 있다.


2. Amplify Shader Graph

3D(Legucy) Pipe line에서 Node 기반 Shader를 작성할 수 없을때 주로 사용했던 플러그 인이며,
지금도 빠른 구현을 위해서 사용하기도 한다. 자료가 방대하며 Shader Graph 와 다르게 디테일한 설정 패널이 노출 되어 있다는게 특징이다
*필자는 Shader Graph에서 작성한 특정 Shader에 오류가 발생되면 사용하는 편이다.
*과거 Shader Graph가 없고 Shader Forge의 개발 종료가 발표되었을때 빛과 소금 그 자체 였다.


-----------------------------------------------------------------------------------------------------------------------------------------------------------------


두 Node Shader Editor의 경우 Unity의 모든 Pipe Line을 지원하며 사용자의 편의성에 따라 사용하는 것을 추천하며,

많이 만들어보는 것을 추천한다.


노드기반의 프로그램은 방대하게 경험해보는 것이 성장의 발판이라고 생각한다.


3. Node Shader 참고 자료

https://wiki.amplify.pt/index.php?title=Unity_Products:Amplify_Shader_Editor/Nodes


Unity Products:Amplify Shader Editor/Nodes - Amplify Creations Wiki

From Amplify Creations Wiki Jump to navigation Jump to search Product Page - Included Shaders - Manual - Shader Functions - Tutorials - API - Shader Templates - Scriptable Rendering Pipeline - Nodes - Community Nodes Available Node Categories Camera And Sc

wiki.amplify.pt


https://www.youtube.com/watch?v=KnueAgpUL3Y&t=1s


https://www.youtube.com/@BenCloward


Ben Cloward

This channel focuses on shader creation and other game development tips and tricks in Unity and Unreal. Subscribe and ring the bell to receive notifications when new videos are added! My opinions are my own and do not represent the positions of my employer

www.youtube.com


https://www.youtube.com/@madumpa2078


Madumpa


www.youtube.com


https://www.youtube.com/@danielilett/videos


Daniel Ilett

I’m Daniel, and I make games. On this channel, I make game development and shader tutorials for Unity, focusing on Shader Graph and the Universal Render Pipeline. Whether you’re looking for general effects like Holograms, Dissolving Objects and Outline

www.youtube.com


https://www.youtube.com/watch?v=XeKNHgdVkRE&list=PL83m62O3BixDYO48vZaIB_AsstJwm9KaU


https://www.youtube.com/@PolyToots/videos


PolyToots

Welcome to PolyToots! This is a tutorial channel for the creation of real time game art. From the perspective of a professional games artist who’s been pushing polys in the industry since mid 2008. Looking to get into the games industry? Already in the i

www.youtube.com


등등등 많은 강의가 있다.

위에서 언급하였지만 많이 만들어 보는 것이 중요하다.


입문을 통해 Node와 친해지게 된다면 그때부터 Code의 해석이 가능해지며,

TA의 시작이 진행된다.
*물론 TA는 Shader 작성만 한다고 할 수 있는 것은 아니다... DCC Tool R&D라든지,,, 최적화라든지,,, Pipe Line Custom 이라든지,,,

arcoreimg.exe
4.35MB


https://developers.google.com/ar/develop/augmented-images/arcoreimg?hl=ko


arcoreimg 도구  |  ARCore  |  Google for Developers

이 페이지는 Cloud Translation API를 통해 번역되었습니다. Switch to English 의견 보내기 arcoreimg 도구 컬렉션을 사용해 정리하기 내 환경설정을 기준으로 콘텐츠를 저장하고 분류하세요. arcoreimg는 참조

developers.google.com


AR Image Target을 진행해야되는 마커의 퀄리티는 매우 중요한 요소중에 하나이다.

구글 디벨롭먼트는 75점이상 되는 마커를 사용하는 것을 권장하고 있으며,


위에 링크와 파일은 윈도우 개발환경에서 마커의 퀄리티 체크를 진행하는 툴이다.


< 사용방법 >


1. Arcoreimg.exe. 를 다운받은 후, 윈도우 + R 키를 눌러 실행창에 CMD를 입력한다.


2. CMD 창을 연다음 아래와 같이 이미지 품질을 확인하는 명령어를 입력한다.

*데이터의 경우 D드라이브의 2.Android라는 디록토리에 arcoreimg.exe를 다운로드 하여 저장하였다.


테스트를 위해 test.jpg 데이터를 활용하여 설명하고자 한다.

D드라이브로 이동하기 위한 명령어 = d:
D드라이브에서 폴더로 이동하기 위한 명령어 = cd 2.Android


Sample /// arcoreimg.exe eval-img --input_image_path=이미지경로\이미지이름.확장자명
arcoreimg.exe eval-img --input_image_path=D:\2.Android\test.jpg


태극기 이미지로 하였을 경우 복잡성이 있음에도 불구하고 50점이라는 점수를 받았다.


구글 디벨롭먼트 내에 문서를 확인하고 실제 Exe를 활용하여 테스트해본 결과

고품질의 마커를 이끌어 내기위해서는 다음과 같은 세팅이 필요하다.


https://developers.google.com/ar/develop/augmented-images?hl=ko%EF%BB%BF#unity-ar-foundation


< Tip >

(1) 300x300 이상의 이미지 데이터

>> 활용되는 마커 이미지의 경우 비율에 상관없이 300 x 300 이상의 이미지 데이터를 활용해야된다.
* 결국 최적화의 영역이기 때문에 알맞은 크기를 세팅하는 것이 좋으며 용량 이슈로 인해 최대 2024 x 2024를 넘지않는 것을 추천한다.


(2) Gray Sclae

>> Image Target 로직의 경우 RGB Color Space를 기준으로 진행하는 것이 아닌 Gray Sclae Color Space로 마커를 인식하기 때문에 여러 컬러를 사용하여 이미지를 만든다고해서 점수가 높아지는 것이 결코 아니다.


(3) 소통

>> 결국 마커의 경우 디자이너가 제작하는 이미지를 따르기 때문에 이와 관련한 내용을 공유하여 디자이너와 싱크를 맞추는 작업이 필요하다.
*마케팅으로 사용되는 마커의 경우 퀄리티 문제가 발생되는 경우가 많아 선행적으로 프로젝트의 PM 및 클라이언트에게 이 내용을 이해시키는 것이 필수적으로 요구된다 생각한다.


Unity Game Viewer에서 프레임을 체크할 수 있는 코드이다.

단점으로는 실제 빌드를 하였을때와 에디터 상에서 프레임의 차이가 발생되는 문제가 있으며,

단순하게 에디터 상에서 확인하기에는 이만한 친구가 없다.

* 해당 코드의 경우 구글링을 통해서 습득한 코드이기 때문에 최초 작성자는 알 수 없다.


using System.Collections;
using System.Collections.Generic;
using UnityEngine;

public class FrameChecker : MonoBehaviour
{
    [Range(1, 200)]
    public int fFont_Size;
    [Range(0, 1080)]
    public float xPos;
    [Range(0, 2400)]
    public float yPos;
    [Range(0, 1)]
    public float Red, Green, Blue;

    float deltaTime = 0.0f;

    private void Start()
    {
       
    }

    void Update()
    {
        deltaTime += (Time.unscaledDeltaTime - deltaTime) * 0.1f;
    }

    void OnGUI()
    {
        int w = Screen.width, h = Screen.height;

        GUIStyle style = new GUIStyle();

        Rect rect = new Rect(xPos, yPos, w / 2, h * 2 / 100);
        style.alignment = TextAnchor.UpperLeft;
        style.fontSize = h * 2 / fFont_Size;
        style.normal.textColor = new Color(Red, Green, Blue, 1.0f);
        float msec = deltaTime * 1000.0f;
        float fps = 1.0f / deltaTime;
        string text = string.Format("{0:0.0} ms ({1:0.} fps)", msec, fps);
        GUI.Label(rect, text, style);
    }
}

'Unity > Script' 카테고리의 다른 글

[Unity] Frame Checker On Editor  (0) 2024.06.18
[Unity] Camare Position Move v1.0  (1) 2024.06.18

+ Recent posts